Using the Abstract Program
These instructions describe how to navigate through a case in the Abstract Program. The focus is not to explain each field or code, but to provide basic operations, helpful hints, and a few useful tricks on using the abstract program.
Open a case in the abstract program. If you are unsure on how to do this, please see the instructions for Opening an Abstract.
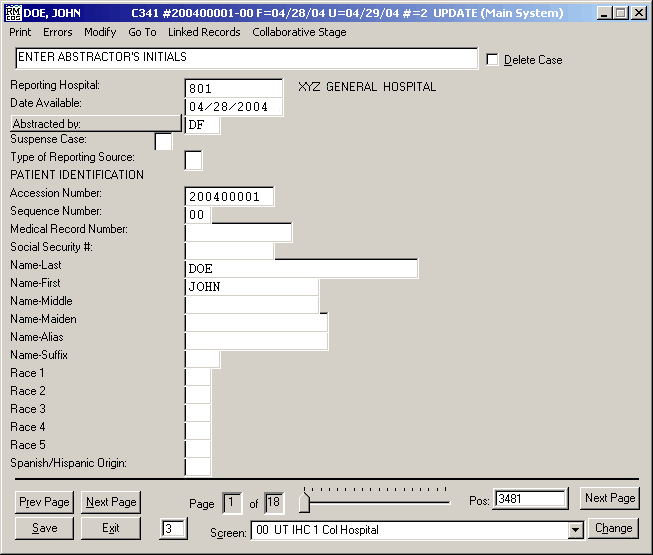
When you first open a case in the abstract program you will see a screen similar to the following.

The Abstract / Update window has many various features and functions. For sake of clarity, these instructions will start at the top of the window and explain the different features in the order they appear.
Title Bar
![]()
In the title bar at the top of the window, the patient name and abstract
number are listed. Notice in the example, Doe, John is to the left followed
by #200400001-00, which is the accession number. The name and abstract number
will be the same on each page of the abstract. This is useful in identifying
which case you are in at any given time, especially if you have more than one
case open at once.
Menu Options

Right below the Title Bar you will find the Menu Options which include Print,
Errors, Modify, Go To, Linked Records, and Collaborative Stage. Click
on the menu title to see the pull down menu as shown in the example. For detailed
instructions on Printing and Abstract click here,
__Running Errors click here
Help Prompt and Delete Case
![]()
The line box below the Menu Options is the help prompt box. If there are special
instructions for a particular field they will be displayed here. In the example
shown the cursor is on the Abstractor's Initials field and so the Help Prompt
gives the instructions to Enter Abstractor's Initials. Some fields that have
only a few valid codes may also display the codes in the Help Prompt. To the
right of the Help Prompt there is a check box called Delete Case. If
you want to delete an abstract you would put a check in this box and exit the
case. The case would be deleted after you exit the case. For detailed instructions
on Deleting a Case click here.
Abstracting Fields

Following the Help Prompt, the Abstracting Fields begin. Some examples are given
here to show some of the features of the abstract fields. Notice in the example
above that each field has a Field Name, a Text Entry Box, and an area for English
Recode. The first field shown in the example has the name "REPORTING HOSPITAL",
the Text Entry Box has "801" in it, and the English Recode is "XYZ
GENERAL HOSPITAL." Not all fields in the abstract will have an English
Recode, for example, "DATE AVAILABLE" does not need an English Recode
because the date is clearly defined by the code. The English Recode will appear
after you have entered the code into the Text Entry Box and moved onto the next
field. Notice also that the ABSTRACTED BY field is elevated. The field that
is currently being coded, or has the cursor in it, is elevated so that it is
easy to distinguish which field is active. Some other Abstract Field features
follow:
Question Mark Lookup
![]()
Notice the small question mark button to the right of the COUNTY AT DIAGNOSIS
field. This button can be used to look up valid codes for the Active Field (the
field that is currently being coded.) The question mark will only appear on
the line after the cursor is placed in that field. Not all fields have question
mark look ups available. To use the Question Mark Look up, simply click on the
button. One of two types of help windows will open, either a Lookup window or
a Code Definition window.
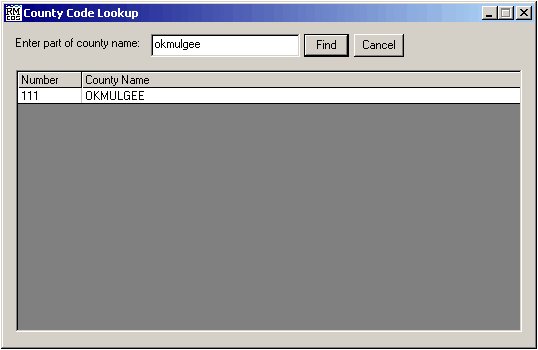
To use the Lookup Window, simply type in part or all of the name you are looking
for and press Find. If the name is found it will be displayed in the
code area. To select a particular code, simply double click on the code under
the Number Column for the value you want. The window will close and the
selected code will automatically be entered into the abstract. If you want to
close this window without selecting a code, press Cancel. The second type of
Question Mark window is the Code Definition window.
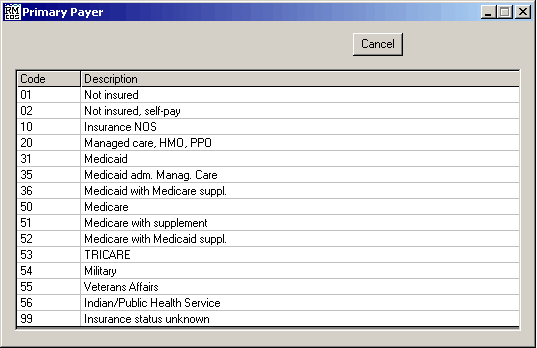
The Code Definition window simply lists out the codes and their descriptions.
To select a particular code, double click on the code under the Code
Column for the value you want. The window will close and the selected code will
automatically be entered into the abstract. If you want to close this window
without selecting a code, press Cancel.
Text Box Button
Some text fields have Text Box Buttons which allow for continuous typing and
word wrap. If the text field has a Text Box button, you will see the letter
T next to the field as seen in the example below

To activate the Text Box Button, click on the T. A new window will open wherein
you can type in the text.
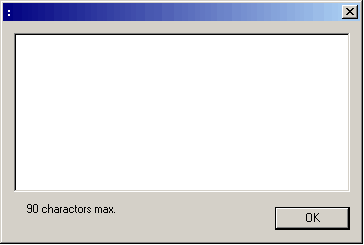
Once you have completed typing in the text, click the OK button. The
text window will close and your text will be entered into your text fields.
Treatment Screen
The screen for Treatment Input can be opened two different ways. The first is
to click on the First Course Treatment label / button.
![]()
The second way is to press Alt T from anywhere within the abstract. (Alt
T will open the Subsequent Treatment window.)
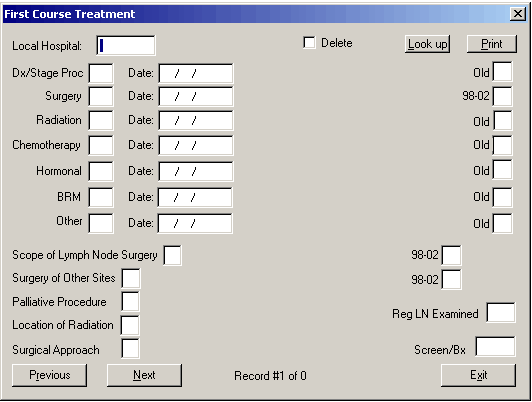
The window for First Course Treatment (and Subsequent Treatment) can
be navigated in the same manner as the regular Abstract screens. The Treatment
window has it's own Print option and the Look up button can be
used by clicking on it while the cursor is in the field for which you want to
find a code. The field labeled Local hospital is to identify the facility
where the treatment being coded took place. If you wish to add treatment performed
at other facilities, click on the Next button at the bottom of the window
and enter the Local Hospital number and treatment for that facility. You can
delete a treatment record by putting a check in the Delete box and exiting
the record.
Navigation Buttons
At the bottom of the Abstract Window there are several Navigation
buttons.

The Prev Page and Next Page buttons help you navigate to the previous
and next pages while going through an abstract. The Save button is used
to save the abstract without exiting the case. It is recommended that you save
your work regularly. The Exit button will close the Abstract window.
When exiting you will be asked if you want to save the case before it closes.
To the right of the Exit button is a small box with a number in it. This number
tell you how many digits the Active Field has available. In our example the
Active Field is ABSTRACTOR'S INITIALS which is a three digit field. If you are
on the SOCIAL SECURITY NUMBER field this box would show a nine, because social
security numbers are 9 digits long.
The Page box and Slider Bar are in the center of the Navigation Area. The Page box lets you know which page of your abstract screens you are currently on and how many pages there are on these abstract screens. The Slider Bar can be used to quickly jump to a particular page. To use the slider bar simply click on the pointer and drag it back or forth along the tabs.
To the right of the Slider Bar is the Pos box. This is the Position in Master File Number for the current abstract. It is shown for your reference and can be useful in opening abstracts by their position number.
Below the Slider Bar is the Screen
box. This box shows you which screen is currently in use and allows you to change
to another screen that is currently defined on your computer. To change the
current screen simply click on the black arrow to the right of the Screen box
and select from the available screens shown. After you have selected a screen,
click on the Change button to switch the abstract to that screen.

Go To
The Go To command allows you to search for a field within the abstract screen
and then have the cursor go to that field. To use this command click on Go
To > Search For Field.

This will bring up the Search for a field on this case window.
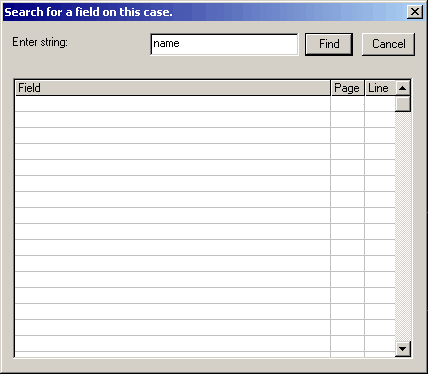
Type in the name of a field you want to locate and click on Find. The search results will appear in the data table.
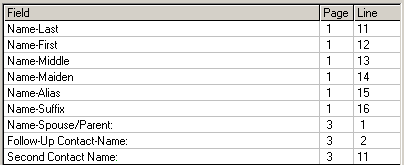
Double click on a field name to go to that field within the abstract. Notice also that the page number and line where the field is found are also listed. NOTE: The Go To command only searches the fields that are available on the current abstract screen. Use screen 90 to search through all available fields.
Abstract Screen Navigation and Control
Navigation through the abstract can be done using the keyboard, the mouse, or a combination of both. (Note: Some fields are computer generated and cannot be modified manually. The text in these fields is blue.)
The navigation control buttons are located at the bottom of the Abstracting window. The controls are simple. Each button has a name and each name has one letter underlined indicating the keyboard shortcut. To utilize the keyboard shortcut, hold down the Alt Key and press the letter underlined on the corresponding button. We will discuss each button, it's function and it's shortcut below.
Clicking on any field with the mouse will activate that field.
Clicking on the Next Page button will take you to the next page of the abstract (Alt N)
Clicking on the Prev Page button will take you to the previous page of the abstract (Alt R)
Notice that when you move to the next page, the Slider Bar at the bottom moves to the right, and when you move to the previous page the bar move to the right. You can also use the Slider Bar to move to different pages within the abstract. The position bar is a quick way to jump multiple pages or move to the end of an abstract.
There are two boxes to the left of the position bar that tell you which page of the abstract screen you are currently on, and how many pages are in this particular abstract screen.
Clicking on the Save button will save the current case but leave the case open (Alt S). Regular saving is a good way to safeguard against data loss due to a power glitch, or a computer freezing up.
Clicking on the Exit button will exit the current case (Alt X). If you have not yet saved the case, it will ask if you would like to do so before exiting. If you do not save, any changes you have made to that case will be lost.
At the bottom right of the window you will find a box labeled Screen. This box tells which screen you are currently using, and allows you to change the screen to another one in your system. There are two ways to change screens. 1. Click on the black arrow to the right of the box. This brings up a pop up menu, listing all available screens on your system. Select the screen that you want to switch to. The pop up menu will disappear, but the screen has not yet been changed, you must first click on the Change button to the right of the of the screen box. After clicking on the Change button, the screen will be updated and you will be automatically taken to the first field in that screen. 2. To change the screens using the keyboard press Alt C, this will activate the screen box. Use the up arrow and down arrow keys to select the screen you want to switch to. Once the screen is selected press Alt H, to change the screen.
The following is a list of keyboard shortcuts for quick reference: (Items in Bold represent keys, if two are listed in sequence it indicates that you are to hold down the first while pressing the second)
Tab or Enter Moves to the next field
Shift Tab Moves to the previous field
Alt N Move to the next page
Alt R Move to the previous page
Alt T Opens the Treatment Screen
Alt Q Opens the Subsequent Treatment Screen
Alt S Save the current case, but do not exit the case
Alt X Exit the current case, (it will ask you if you want to save if you have not done so)
Alt C Allows you to select a different screen to abstract in (must also use Alt H to change screen)
Alt H Changes to the screen that you selected using Alt C
Alt D Marks the case as deleted
Alt P Pulls up the list of print options
Alt E Pulls up the error report options