Frequency Report
These instructions describe how to create a frequency report in the RMCDS programs. A frequency report gives you the number of instances each code appears for a particular variable within a specified subset of cases. Before you can run a frequency report, you must first create a subset of cases on which to run the report. If you would like to see instructions on Creating a new Subset click here.
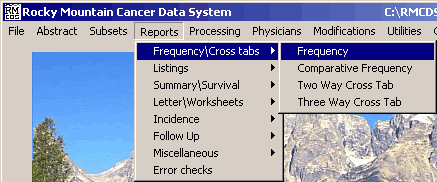
To create a frequency report, click on Reports > Frequency/Cross Tabs > Frequency

This will bring up the Frequency Report window.
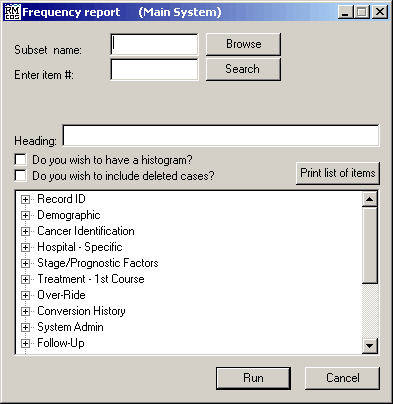
First, type in the name of the subset you want to use for this frequency report in the box labeled Subset Name. Click on Browse to select the subset from a list of available subsets on your computer.
Next you will need to select the Item # of the variable for which you want to see the frequencies. There are several ways to select the item #, if you know the item number that you wish to use, type it into the line labeled Enter item #. If you want to search for the item number, click on Search. This will bring up a Search for Data Items window.
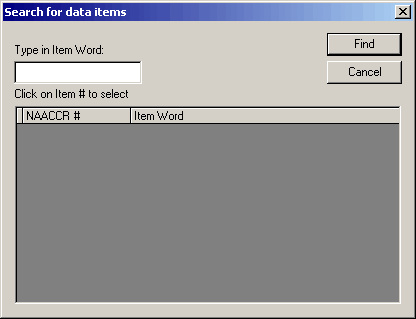
In the box labeled Type in Item Word: enter all or part of the variable you want to use, and click Find. (For example, if you wanted to do a Frequency by Race, you would type in the word Race and click Find.) All of the available matches to your search will appear in the box below.
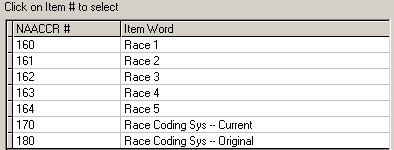
Double click on the NAACCR # of the variable that you want to use. The window will close and you will return to the Frequency Report window. The Item # that you selected on the search window will be in the Enter Item # box.
You can also use the tree structure at the bottom of the window to locate variables.
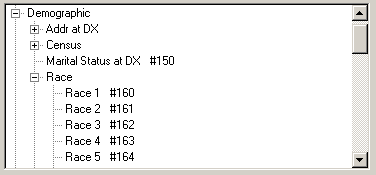
Expand the sections the tree sections by clicking on the + symbol next to the labels. When you find the variable that you want to use, click on it and the Item # will automatically be entered in the Enter Item # box. Notice also that the item numbers are listed next to the variable name for your reference.
After selecting a subset name and Item number, you can give this report a title by entering text in the box labeled Heading. The Heading is optional.
To have a histogram (small bar graph) included in the report put a check in the box labeled Do you wish to have a histogram? To include cases that have been marked as deleted put a check in the box labeled Do you wish to include deleted cases?
Once you have all the information entered, click on Run. The report will be generated and you will be taken to the print options window.
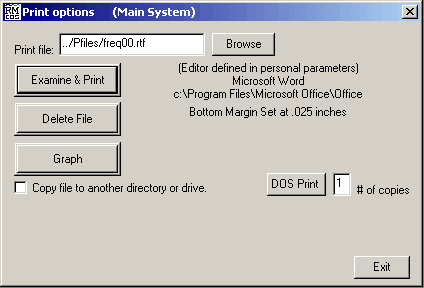
This window gives you the options to Examine & Print, Delete File, and Graph the frequency report. Click on Examine & Print to open the report in the editor defined in your personal parameters. Click on the Graph button to open the report in Excel or Quattro Pro, depending on your personal parameter settings. To generate a graph in either of these programs, highlight the data section and choose the 'generate chart or graph' option. For detailed instructions on using Excel or Quattro Pro, please see the instructions for those programs.