Running Custom Mail Merge Letters
These instructions describe how to run Custom Mail Merge Letters in RMCDS. Before you can run Custom Mail Merge letters you must first create a Mail Merge Template and and a corresponding RMCDS Mail Merge Data File. To see instructions on Creating Custom Mail Merge Letters click here.
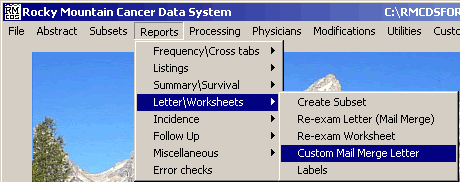
From the RMCDS Main Menu click on Reports > Letter/Worksheets > Custom Mail Merge Letters

This will open the Creates Data Files to import into a mail merge document window.
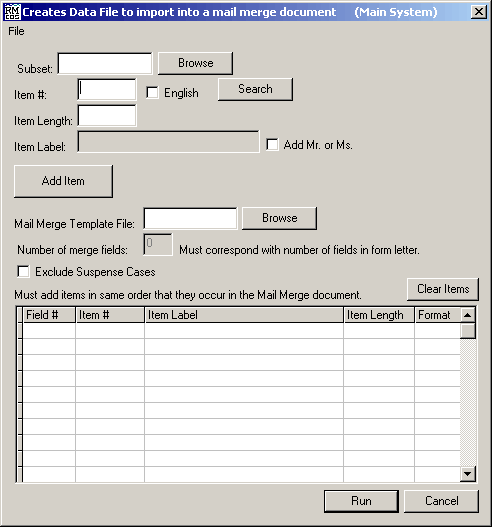
The next step requires that you already have a Mail Merge Template and RMCDS Mail Merge file created. To see instructions on Creating Custom Mail Merge Letters click here.
Click on File > Load File Format

This will bring up a Load window
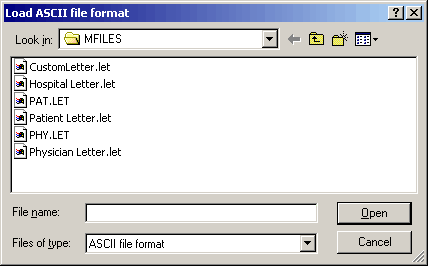
From the list select the custom letter file that you want to use. (Note the custom letter files will have the names given to them when they were created. PAT.LET and PHY.LET are sample custom letter files.) After selecting the file you want to load, click on Open. The Load window will close and you will return to the Creates Data Files to import into a mail merge document window. Notice that the fields that are defined in this letter file get loaded into the Selection table.
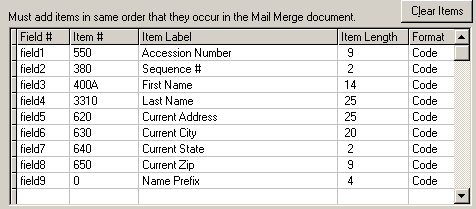
Once you have loaded the Custom File Format that you want to use for your letters, you need to specify the name of the Mail Merge Template File. It is recommended that the Custom File Format and the Mail Merge Template File have the same name for sake of clarity. Enter the name of the Mail Merge Template File in the box provided by typing it in or by clicking on the Browse button and selecting it from a list.
![]()
After you have loaded the Custom File Format, and selected the Mail Merge Template File click on Run. The program will generate the source file for the Mail Merge Letters and when it is done you will get a File Compete message letting you know the subset used, the Output File name and the number of records for which letters will be created.
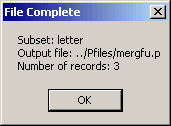
BEFORE YOU CLICK OK, BE SURE TO MAKE NOTE OF THE FILE NAME AND PATH IN THIS MESSAGE WINDOW. This message box tells you the name and location of the file that is to be used as the data source for the mail merge. The message box will say Output file ../Pfiles/mergfu.p. It will be necessary that you know the name and location of this file to complete the mail merge process. Note: The file name and location for the custom mail merge letters will always be ../Pfiles/mergfu.p.
After noting the name and location of the file created, click on OK.
When you click on OK, Microsoft Word © or Corel Word Perfect © will open, depending on what is defined in your parameters program. Word or Word Perfect may open in the back ground. If you don't see the editor screen, check the programs bar at the bottom of your screen to see if it appears down there. If the editor doesn't open, check your personal parameters to make sure the proper editor is defined and that its path is valid. Custom Mail Merge Letters cannot be created using Word Pad.
Follow the instructions for your defined editor.
Word
If you are using Microsoft Word, follow these instructions.
When Word opens, you may see the following message. If you don't see this message continue down to the Unmerged Custom Letter Section.

Click on Find Data Source...
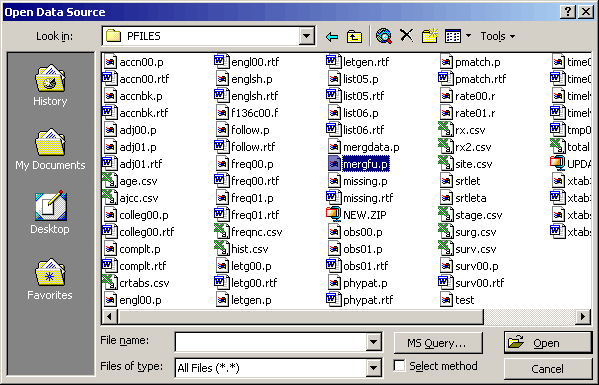
This will open the Open Data Source window.
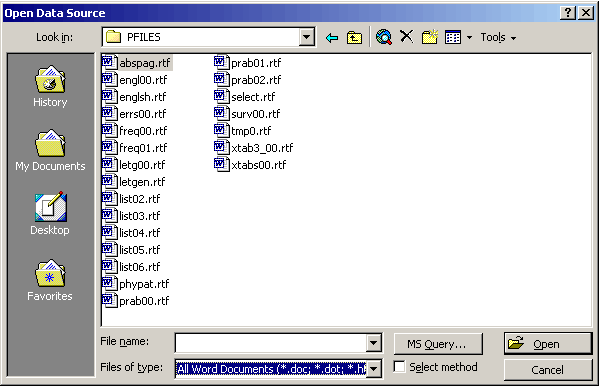
In this window you will need to navigate to your RMCDS\Fords\Pfiles\ directory. If you are not sure where RMCDS is loaded on your computer then look at the path on the fourth line below the picture on your RMCDS Main Menu as shown in the example below.
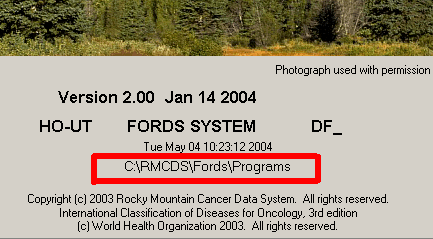
The Pfiles directory will be in the same FORDS folder as the Programs directory. Your RMCDS programs may be loaded on a network drive or in a different directory. Make sure you navigate to the proper directory so that in the Open Data Source window the line labeled Look in has PFILES in it.

The next step is to find the file that was listed in the File Created message box. The file name is ..\Pfiles\mergfu.p. By default, the Open Data Source window in Word displays only word documents. Before you will be able to see the file mergfu.p you must first change the view to ALL FILES. At the bottom of the Open Data Source window there is a line labeled Files of type. Click on the black arrow to change this to say All Files (*.*)
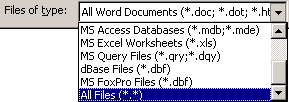
You may have to use the scroll bar on the drop down menu to locate the All Files (*.*) option. Now find the file called mergfu.p, highlight it, and click on Open.
Word will now open the UN-merged Custom Letter.
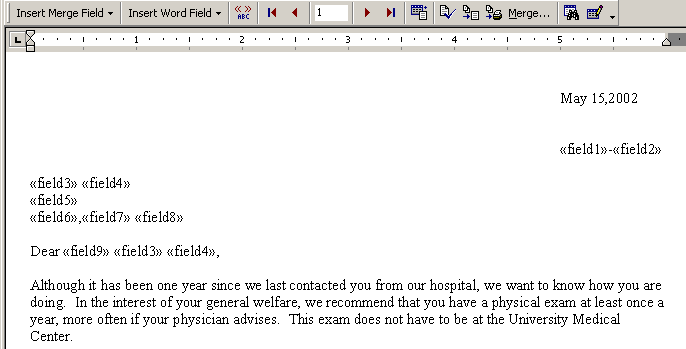
Notice that the specific patient information is not yet in the letter. We still have to merge the documents to get the data. In Word click on Tools > Mail Merge
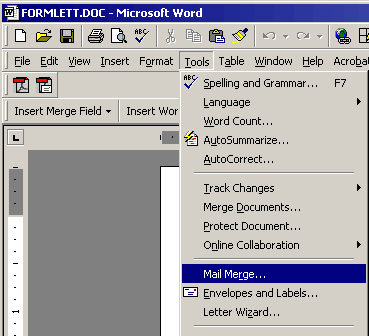
This will open the Mail Merge Helper.
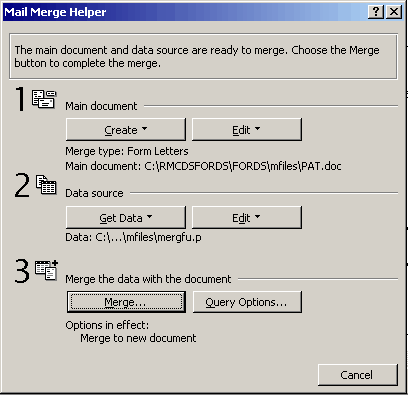
Make sure that the Data Source next to number 2 is set as ..\PFILES\mergfu.p

If it is not set as ..\Pfiles\mergfu.p click on the Get Data button and choose Open Data Source
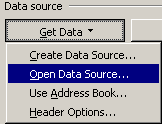
This will open the Open Data Source window. Please see the instructions above under the line labeled 'This will open the Open Data Source window.' to select the data file.
Once the Data Source file is set at ..\Pfiles\mergfu.p you are ready to merge the letters. Next to number 3 click on Merge...

This will open a Merge window.
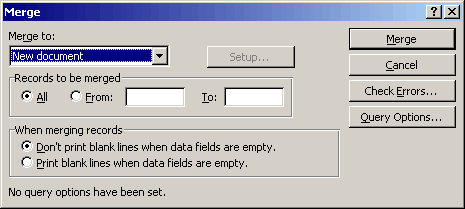
In the Merge to: box select New Document. In the area labeled Records to be merged choose the radio button All. In the area labeled When merging records make sure to select the radio button for Print blank lines when data fields are empty. After selecting these options, click on Merge.
Word will merge the records and create the final Physician Follow-up letters. The letters are now ready to print. In Word, click on File > Print to bring up your print options. When you close word, do not save any changes to the file Custom Mail Merge Template. You can save your merged letters if you like.
Word Perfect
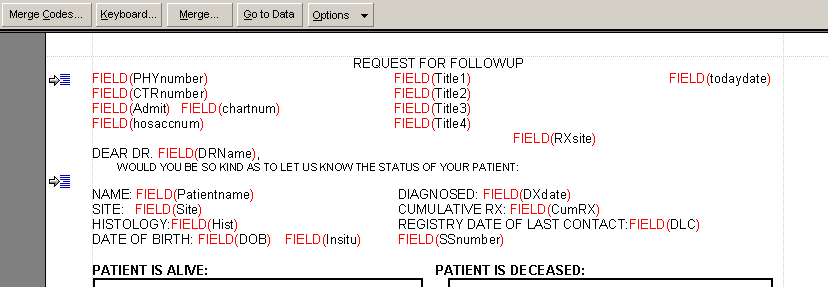
Follow these instructions if you are using Word Perfect to do the mail merge. When Word Perfect opens you will see the form letter and a Mail Merge tool bar.
Before running the mail merge, you must first convert the data source file in Word Perfect. In Word Perfect click on File > Open.
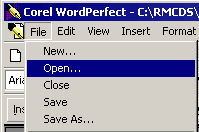
This will open the Open File window.
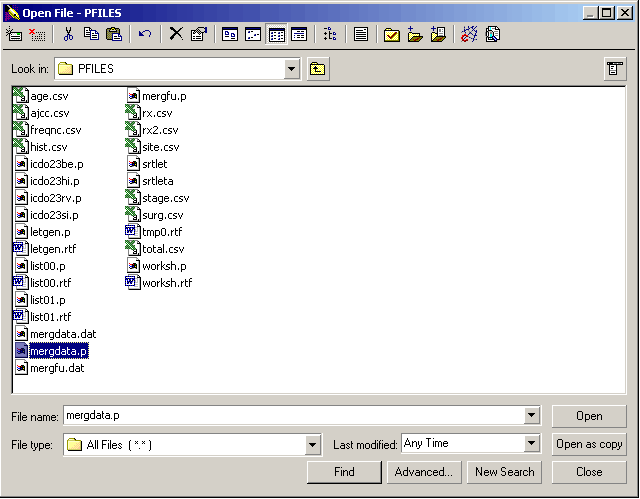
Navigate to the ..\FORDS\Pfiles\ directory on your system and select the file mergfu.p. If you are not sure where RMCDS is loaded on your computer then look at the path on the fourth line below the picture on your RMCDS Main Menu as shown in the example below.

The Pfiles directory will be in the same FORDS folder as the Programs directory. Your RMCDS programs may be loaded on a network drive or in a different directory. Make sure you navigate to the Pfiles directory. Make sure the File Type line says All Files (*.*) and select the file mergfu.p. Click on Open. This will bring up the source data.

The source data file needs to be saved as a mail merge data source type. Click on File > Save. This will bring up a window labeled Convert File Format.
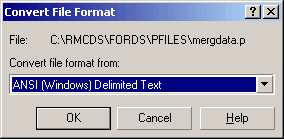
In the box labeled Convert file format from: change the option to ANSI (Windows) Delimited Text from the drop down menu by using the black arrow. Once ANSI (Windows) Delimited Text is selected, click on OK. The Import Data window will open.
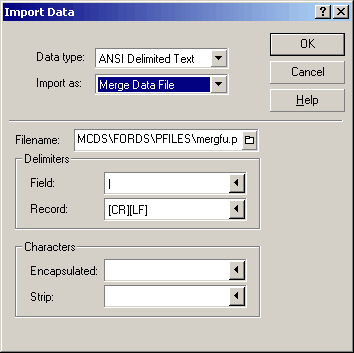
In this window make sure the Data type is set to ANSI Delimited Text, Import as is set as Merge Data File, File name is \PFILES\mergfu.p, in the Delimiters box the Field is set as a | ( the '|' symbol is know as the pipe symbol. Type it in by using the <Shift> \ combination.) Record should be [CR][LF], and Encapsulated and Strip should be blank. Also, make sure the First record contains filenames box at the bottom of the window is checked. Your window should match the sample window above.
When all of the appropriate fields are entered, click on OK. You will then return to the data source window. Click on File > Close. This will close the new data source window and take you back to the Follow-up Form. The letter is now ready to merge. On the Mail Merge tool bar click on Merge

This will bring up the Perform Merge window.
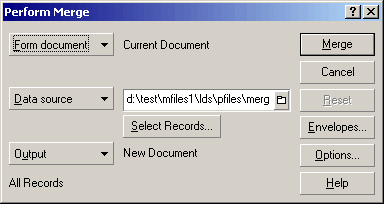
Click on the white folder to the right of Data Source
![]()
From the Open File window select mergefu.dat in the pfiles folder and click on Select.
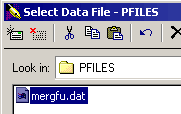
This will take you back to the Perform Merge window. Click on Merge. Word Perfect will generate the letters. The letters are now ready to print. In Word Perfect, click on File > Print to bring up your print options. When you close Word Perfect, do not save any changes to the file Custom Mail Merge Template. You can save your merged letters if you like.