Create Custom Mail Merge Templates
These instructions describe how to create custom Mail Merge Templates for use with the RMCDS Custom Mail Merge program. For help on running letters for existing Custom Mail Merge Letters click here.
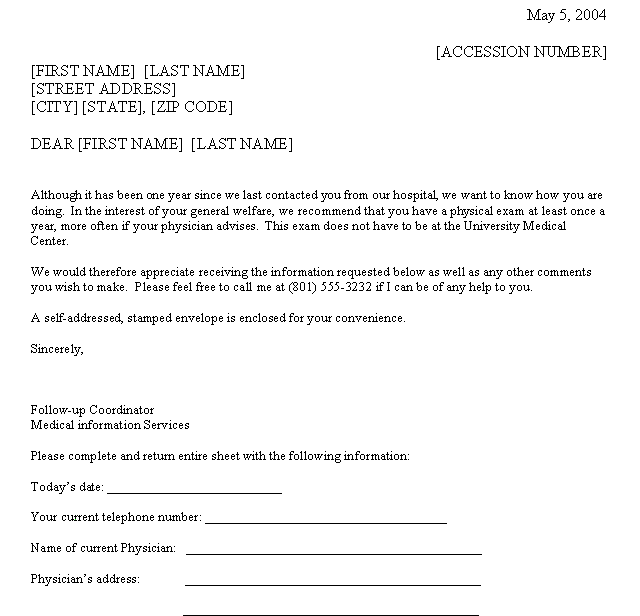
Before continuing with this procedure, it is highly recommended that you design a Custom Letter with all of the fields you want to include named in your Sample Custom Letter. For example, if I wanted to create a new custom patient letter, I may do the following design.

Now I know that in my Custom Mail Merge Template I am going to want to include the following fields: ACCESSION NUMBER, FIRST NAME, LAST NAME, STREET ADDRESS, CITY, STATE, and ZIP CODE. (You can include almost any of the abstract variables in a mail merge letter, this is only a sample of what can be used.)
Once you have determined which data fields you are going to want in your Custom Letter, you are ready to create a Custom Mail Merge Data Format File in RMCDS.
From the RMCDS Main Menu click on Reports > Letter/Worksheets > Custom Mail Merge Letters
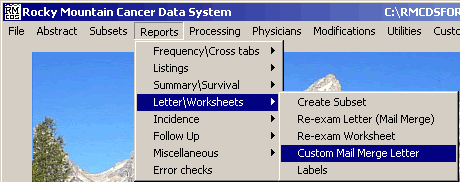
This will open the Creates Data Files to import into a mail merge document window.
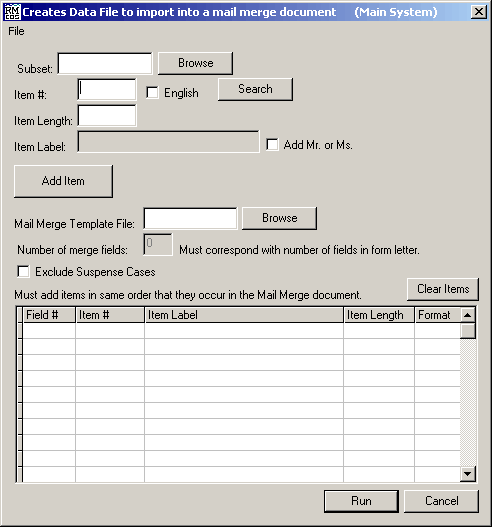
This window allows you to select which data items you want to use in your Custom Mail Merge Letter. In my sample letter I am going to use the following fields: ACCESSION NUMBER, FIRST NAME, LAST NAME, STREET ADDRESS, CITY, STATE, and ZIP CODE.
The first step in adding a field
is to enter the Item # for that variable in the box provided.
![]()
If you do not know the Item # click on the Search button to look it up. Clicking on Search brings up the Search data items by key word window.
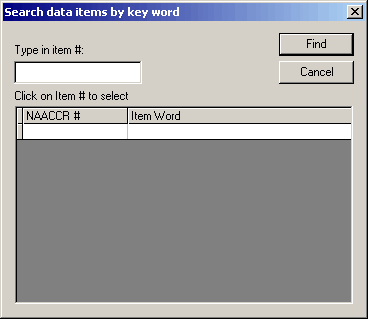
In the box labeled Type in Item #, enter the name for the variable Item # that you want to locate and click Find. For my sample letter the first variable I want to add is ACCESSION NUMBER.
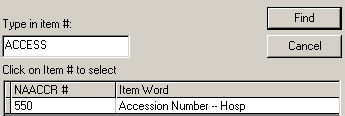
Notice that I did not have to type in the whole Item Word ACCESSION NUMBER. I only typed in a part of the word ACCESS. The results of my search appear in the box bellow. To select an item simply click on the corresponding number in the NAACCR # column, in this case 550. After you click on the NAACCR # for the item you want, your selection will automatically be added to the Item # box in the Creates data file to import into a mail merge document window.
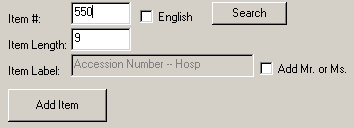
The fields Item Length and Item Label are automatically filled in. Click on the Add Item button to add this item to the selection table.

In my sample letter, ACCESSION NUMBER is now my FIELD1. It will be important to know which variable corresponds to which field number later on. You may want to make note of the Field # for each variable that you add.
Now it is time to add the second variable. It is done the same way. Enter the Item # (click Search if you need to look it up) and click the Add Item button. Once the item is in the Selection Table, move on to the next Item # until all of your variables are added.
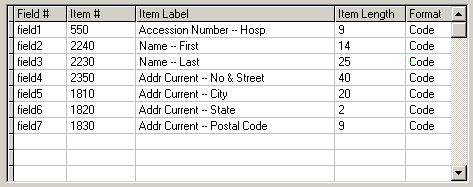
I now have all of the variables that I wanted for my Sample Letter loaded in the Selection Table. The next step is to Save the Custom Format that has just been created. At the top of the window click on File > Save Format

This will open a Save screen where you can choose a name for your Custom Letter Format.
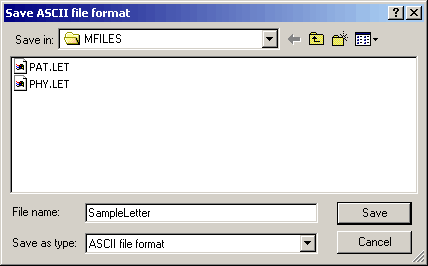
For my Sample letter, I have chosen the name SampleLetter Choose a File Name that will help you remember what the custom letter is for, but try to keep the name short. (You cannot have any spaces in the File Name for this format.) Click on the Save button to save the format and close the window.
Other Options
If you are adding a field that is entered into the abstract as a numeric code,
but you would like to put the English recode in the patient or physician letter,
make sure to put a check in the English button before clicking the Add
Item button. For example, if you wanted to add Primary site, and needed it to
be the English code instead of the four digit numeric code, you would put a
check in the English box before clicking Add Item.
If you are adding a Name Field, and you want either MR or MS to appear before the name, put a check in the box labeled Add MR. or MS.
If you want to Exclude Suspense Cases put a check in the appropriate box.
If you want to edit or delete a single
field that has been entered, double click on the Item # for that field
in the Selection Table. A Change Value of items window will open.
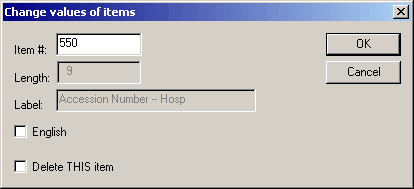
Put a check in the English box if you would like to use the English recode for this item. Put a check in the Delete THIS item box if you want to remove only this item from the Selection Table. Click on OK when finished.
After you have entered the variables you want for your Custom Letter and Saved the Format, you will be ready to continue to the final step in the Custom Mail Merge Letter creation. To get to this final step you will first need to enter a Subset name and a temporary Mail Merge Template File. Type in the Subset name you wish to use, or click on Browse to select one from a list. It is recommended that you use a small subset of cases for this part.
Next click on the Browse button next to the line Mail Merge Template File.
![]()
The Merge Template Files window will open.
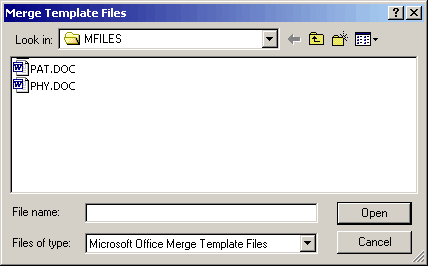
Choose PAT.DOC and click Open. NOTE: YOU WILL SELECT PAT.DOC FOR THE PURPOSE OF CREATING YOUR OWN MAIL MERGE DOCUMENT. AFTER CREATING YOUR CUSTOM LETTER, YOU WILL NO LONGER USE PAT.DOC.
Once you have the Subset name and Mail Merge Template File entered, click on Run. The program will run and you will get a Results window
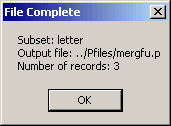
Click on OK. Word will now open with the PAT.DOC file loaded.
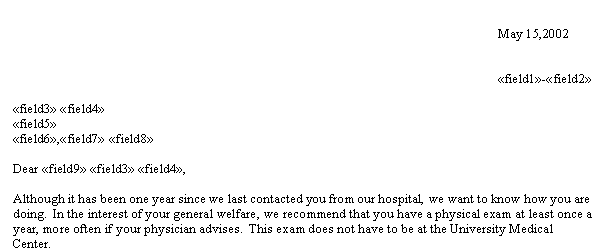
After Word opens with the PAT.DOC file loaded, highlight all of the text in the window and press the Delete key. This will delete all of the text in this window. You can now enter your Custom Letter Text and Merge Fields. Type your text into Word and when you get to the place where you want to add your first variable, click on the Insert Merge Field button in word.
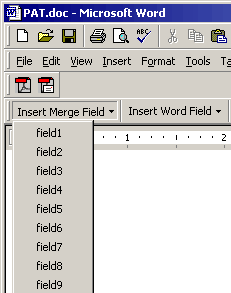
This is the point where you need to refer to the list on Field numbers and Variable names that you noted earlier. In my SampleLetter field1 was ACCESSION NUMBER. So when I get to the point in my letter that says ACCESSION NUMBER, I'm going to delete it and Insert Merge Field... field1. When you get to the point in you letter where you need to add a merge field, click on the Insert Merge Field button and select from the list given. Continue this until you have created your letter with all of the text and merge fields located where you want.
After you have entered the letter text, and all of the Merge fields, you are ready to save your Custom Mail Merge Letter. Click on File > Save As
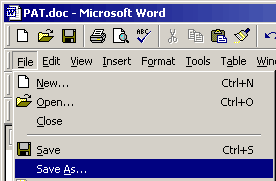
In the Save As window type in the name for your Custom Mail Merge File
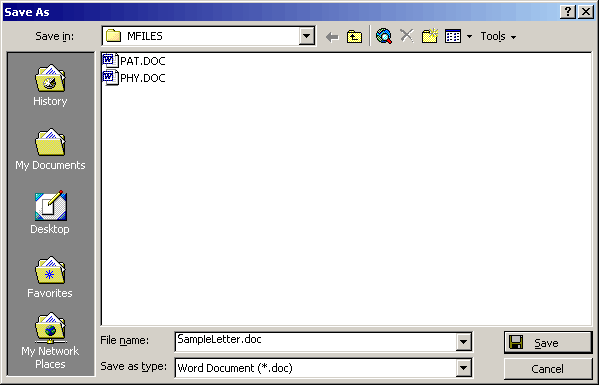
IT IS HIGHLY RECOMMENDED THAT YOU SAVE THE MAIL MERGE LETTER TEMPLATE WITH THE SAME NAME THAT YOU USED FOR YOUR RMCDS CUSTOM FIELD FORMAT.
In my example I named the RMCDS File Format SampleLetter. I am going to name the Mail Merge Temple with the same name. SampleLetter. After naming the file, click on the Save button. Word will save the file.
You will now need to close Word. (If asked, do not save changes to PAT.DOC)
Your Custom Mail Merge Format and Template are now ready to use. To see instructions on how to run Custom Mail Merge Letters click here.